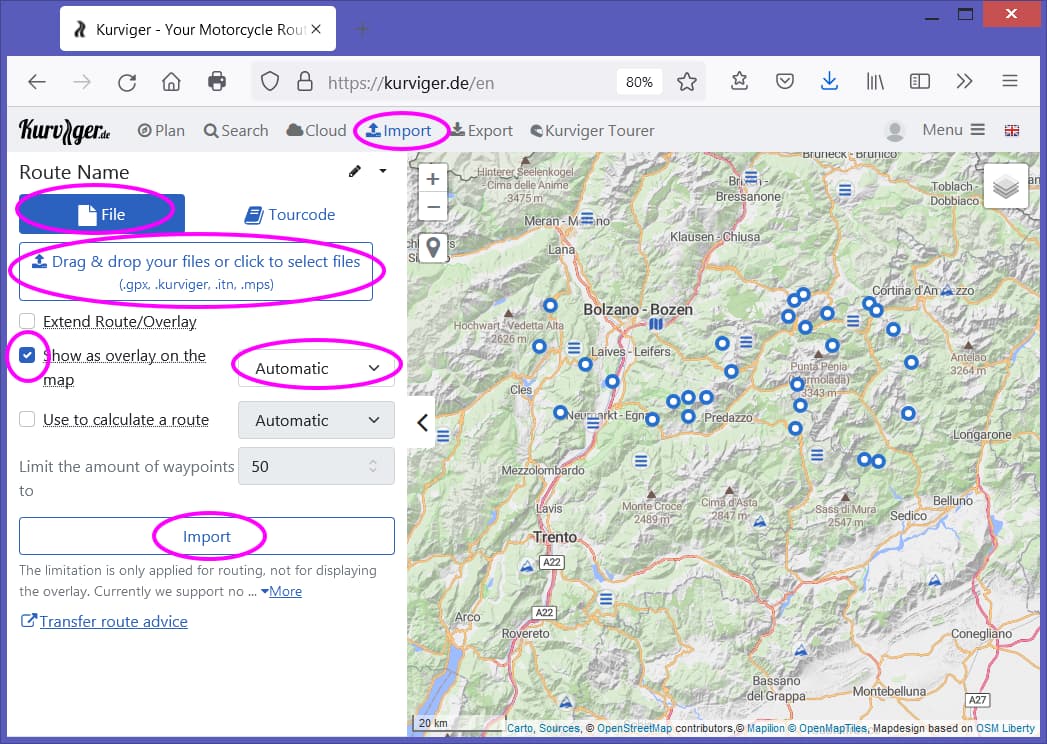
Overlay waypoints imported from an GPX can be added to the route quite easyly in app and on website - also in app they are “tapable”, thanks to @devemux86 :
There are several mountain pass databases available already, but I was interested in the mountain passes from OSM database (they are shown in app and on website, but in app they are not “tapable”).
It is quite easy to export mountain passes e.g. from overpass turbo, but there you get also a lot of them you might not be interested in (e.g. them in paths, steps, footways, cycleways or even in tracks).
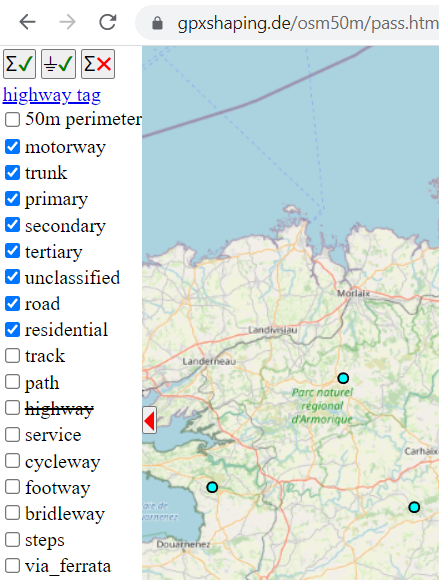
So I set up a web page where you can show / hide OSM passes by category of ways where they are in, select / deselect rectangle areas and download them as GPX:
Some technical background information:
To reduce the load on overpass api, once a week (in the night from sunday to monday) the information about mountain passes and their parent ways is requested from overpass api and stored on gpxshaping.de. Additionally I set the browser cache duration of data files to one week - so the downloaded information can be up to two weeks old.
Furthermore the test depth is low - there might be bugs in, feedback is welcome!
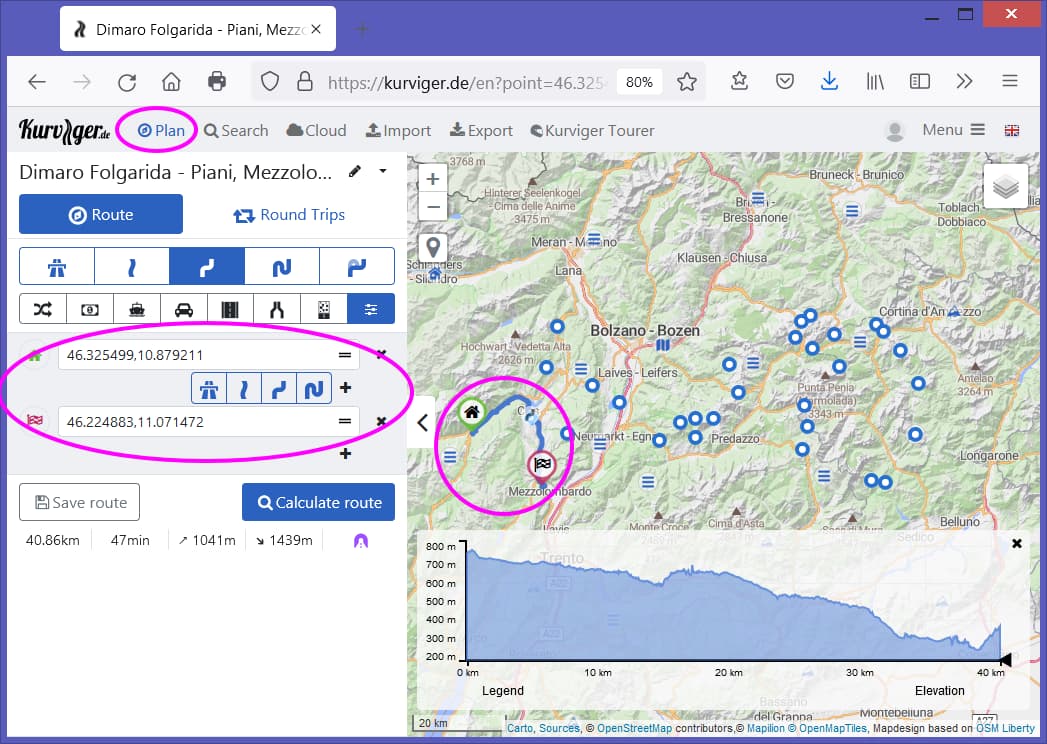
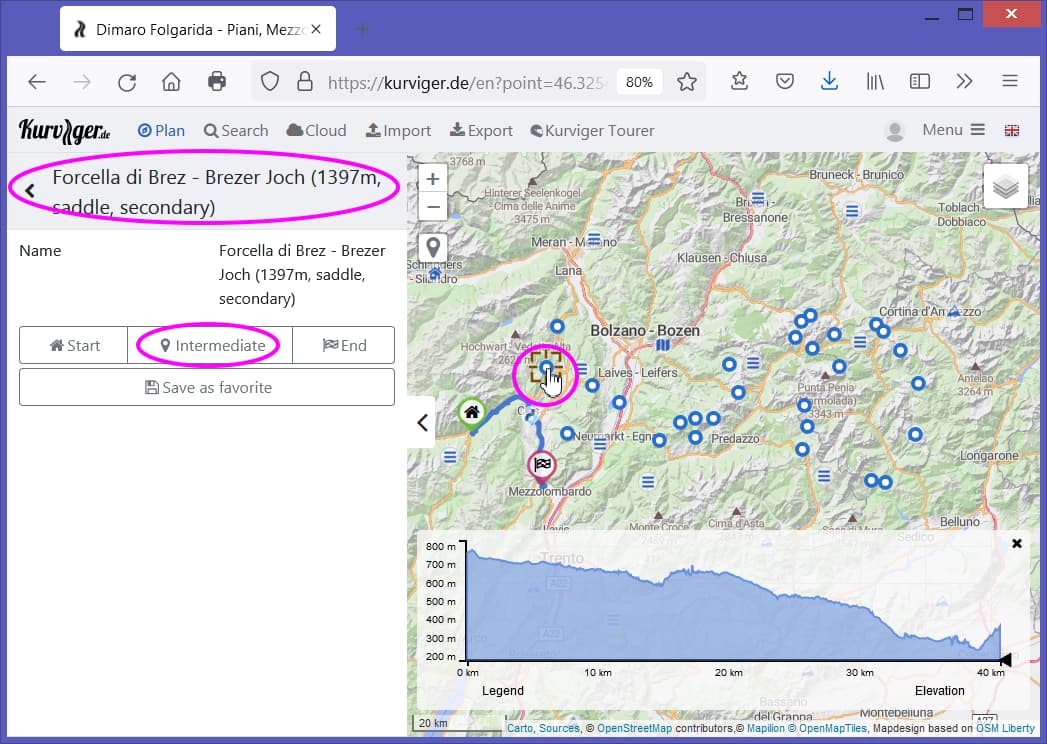
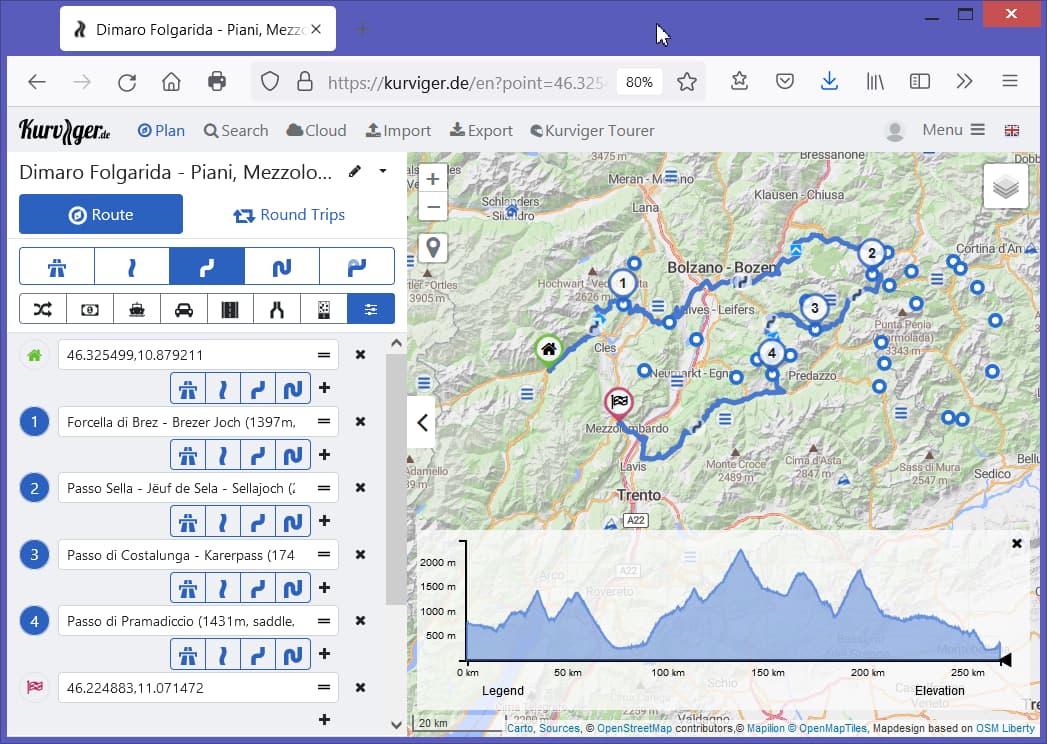
As you see there are the names of the passes in the waypoint list. This is the case when you operate as described above.
In the waypoint list in the screenshot you see via points at the passes. Changing via points to shaping points (or vice versa) is very easy: Only a click (or tap) on the numbered point in front of the field with the pass name is necessary.
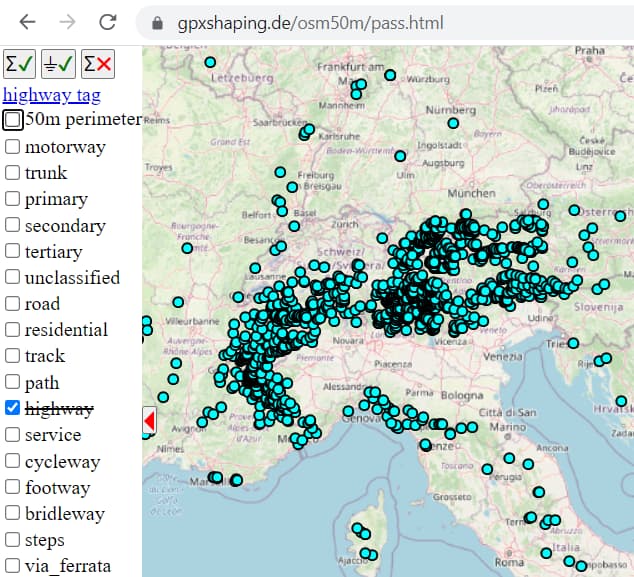
Triggered by a user feedback I put an Betaversion!!! ( low test depth, if it works, I transfer it to the normal version and delete the beta version again): Pass Beta 50m
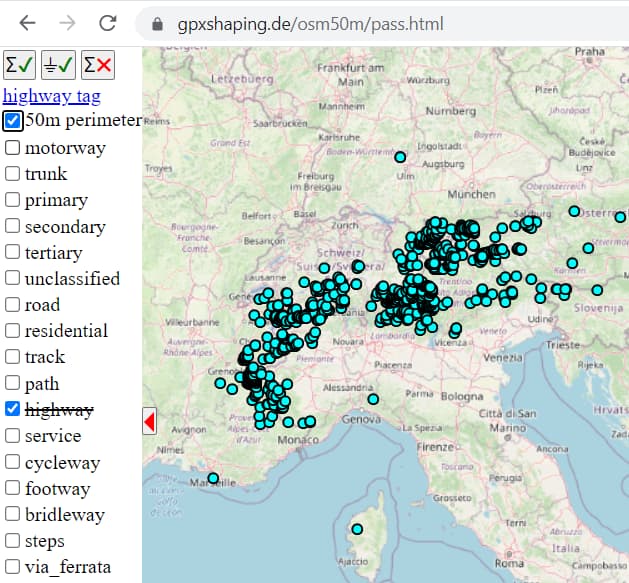
With the switch you can turn on that roads within a radius of up to 50m around the waypoint are taken into account:
If you are specifically looking for the passes without highway tag near roads (e.g. to edit them on OSM ), you can turn on only the ones without highway tag, turn on and off the switch “50m radius” and see where something changes (passes that disappear when you turn on “50m radius” are suspicious):


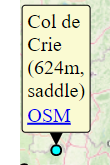 you can jump directly to the OSM display of the corresponding pass.